
Choosing the Right Retro Style for Your Home
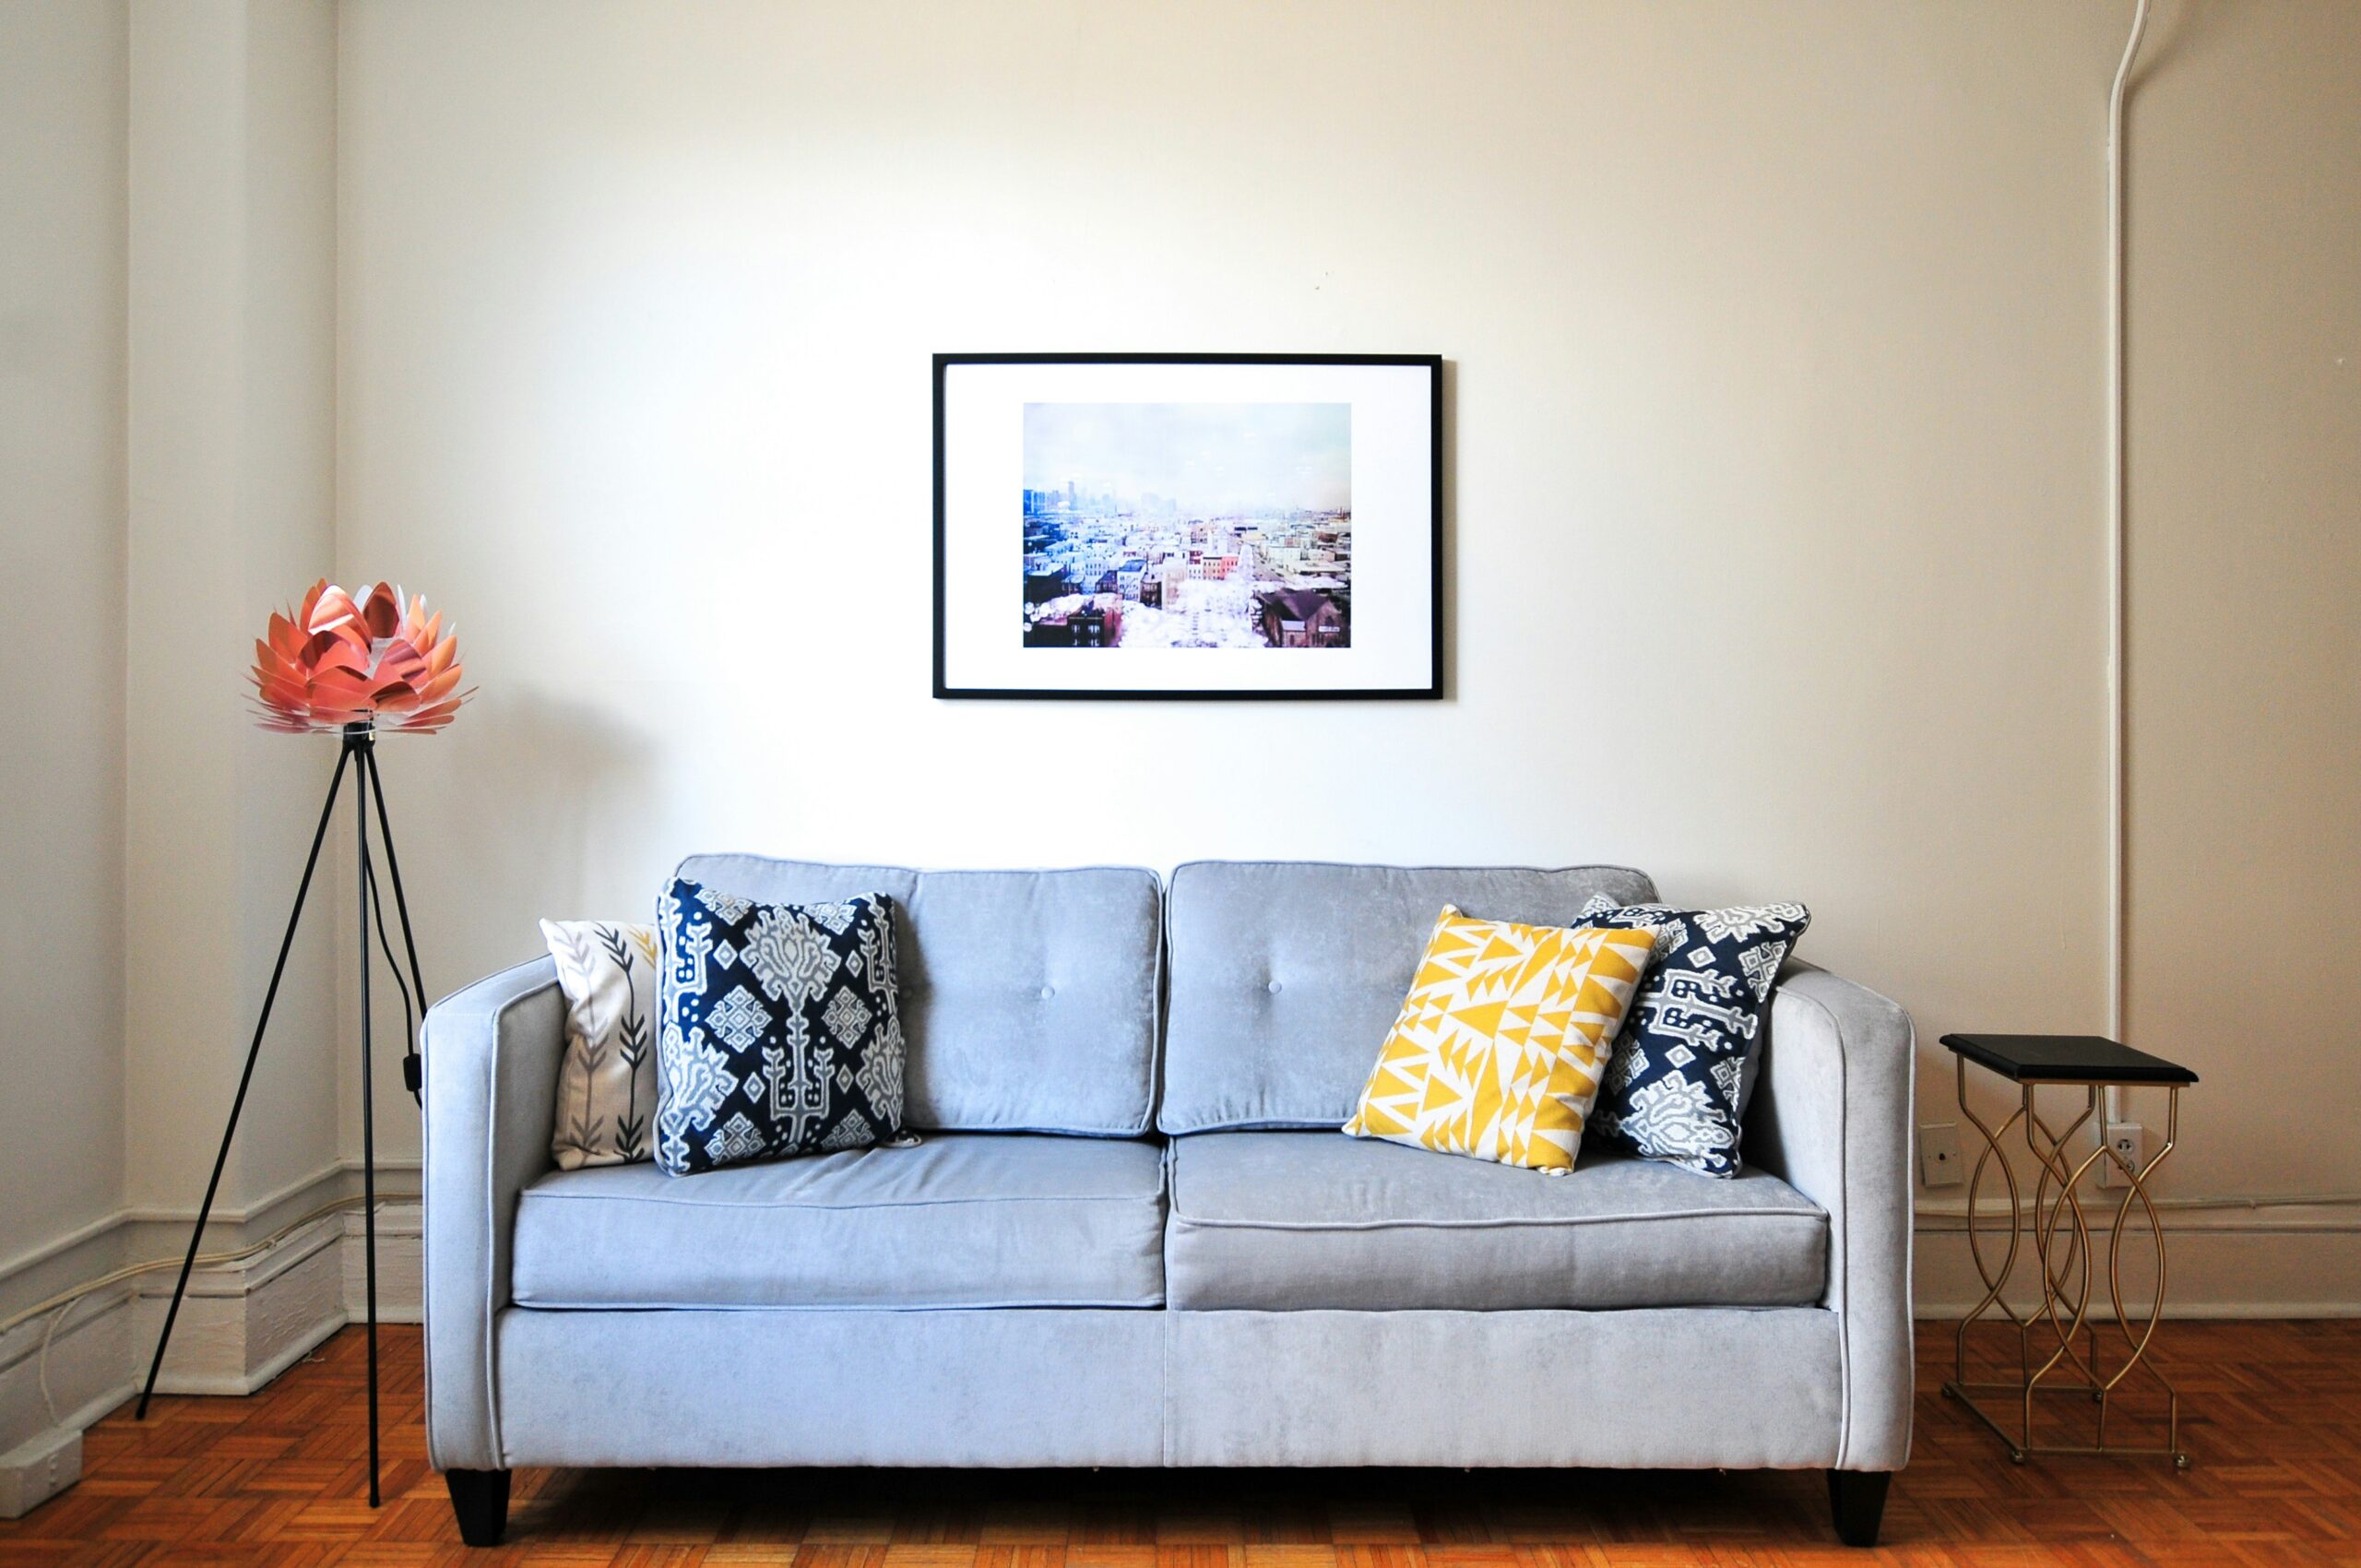
When it comes to choosing the right retro style for your home, it’s important to consider your personal taste and the overall aesthetic you want to achieve. Whether you’re drawn to the bold colors and geometric patterns of the 1960s or the sleek lines and earthy tones of the 1970s, there are plenty of options to explore. Vintage lighting fixtures, furniture, and decor elements can all play a key role in bringing your retro vision to life.
One approach is to mix and match different retro styles to create a unique and eclectic look that reflects your personality. For example, you could pair a funky 1970s pendant light with a mid-century modern floor lamp for a playful and dynamic contrast. Don’t be afraid to experiment with different combinations until you find the perfect blend of retro charm and modern sophistication that resonates with you and enhances the overall ambiance of your home.
• Mix and match different retro styles to create a unique look
• Pair a funky 1970s pendant light with a mid-century modern floor lamp for contrast
• Experiment with different combinations until you find the perfect blend of retro charm and modern sophistication
Materials Needed for DIY Retro Lamps and Lighting Fixtures
For those looking to embark on a DIY retro lighting project, there are a few essential materials that are key to achieving that vintage-inspired look. To start off, you’ll need a base for your lamp or fixture, which could be a simple lamp kit or an old lamp that you’re upcycling. Other basic materials include a light bulb, electrical wiring, and a plug if your fixture requires one. Additionally, don’t forget to have a socket, socket ring, and a lampshade frame on hand to complete the look.
In terms of design elements, you may want to consider using retro-inspired materials like brightly colored fabrics for your lampshade or brass fittings for a mid-century modern feel. Be sure to have basic tools such as wire cutters, pliers, and a screwdriver to assist you during the assembly process. Once you have gathered all the necessary materials, you’ll be ready to dive into the creative process of crafting your own bespoke retro lighting fixture.
• Base for lamp or fixture (lamp kit or old lamp)
• Light bulb
• Electrical wiring
• Plug (if needed)
• Socket
• Socket ring
• Lampshade frame
When it comes to design elements, consider:
• Retro-inspired materials like brightly colored fabrics
for lampshade
• Brass fittings for a mid-century modern feel
Don’t forget basic tools:
• Wire cutters
• Pliers
• Screwdriver
Once you have all the materials and tools ready, you can start the creative process of crafting your own unique retro lighting fixture.
Step-by-Step Guide to Creating a Retro Lampshade
To start creating a retro lampshade, gather all necessary materials including a wire lampshade frame, retro fabric of your choice, fabric glue, scissors, and a pencil. Lay the fabric flat on a clean working surface and place the lampshade frame on top. Use the pencil to trace around the frame, leaving a few extra inches of fabric on all sides for wrapping.
Next, carefully cut out the fabric along the traced lines. Apply a thin layer of fabric glue along the top and bottom edges of the lampshade frame. Press the fabric onto the frame, smoothing out any wrinkles or bubbles as you go. Once the fabric is securely glued to the frame, trim any excess fabric and allow the glue to dry completely before installing the lampshade onto your retro lighting fixture.
• Gather all necessary materials including wire lampshade frame, retro fabric, fabric glue, scissors, and pencil
• Lay fabric flat on clean working surface and place lampshade frame on top
• Trace around the frame with a pencil leaving extra inches of fabric for wrapping
• Carefully cut out the fabric along traced lines
• Apply thin layer of fabric glue along top and bottom edges of lampshade frame
• Press fabric onto frame, smoothing out wrinkles or bubbles
• Trim excess fabric and allow glue to dry completely before installing lampshade
Upcycling Vintage Items into Unique Lighting Fixtures
Upcycling vintage items into unique lighting fixtures can bring a touch of nostalgia and character into your home decor. One creative way to repurpose vintage finds is by transforming old mason jars into charming pendant lights. By adding a simple light kit and hanging them at varying heights, you can create a whimsical and illuminated display that adds warmth to any room.
Another idea for upcycling vintage items is to turn old metal colanders or graters into eye-catching light fixtures. These kitchen items can be easily transformed by wiring a lightbulb into the center and suspending them from the ceiling. The result is a quirky and functional lighting piece that adds a cool industrial vibe to your space.
• Upcycling vintage items can add nostalgia and character to your home decor
• Transforming old mason jars into pendant lights creates a whimsical display
• Hanging the mason jar lights at varying heights adds warmth to any room
• Old metal colanders or graters can be turned into eye-catching light fixtures
• Wiring a lightbulb into the center of these kitchen items creates a quirky lighting piece
• Suspending them from the ceiling adds a cool industrial vibe to your space
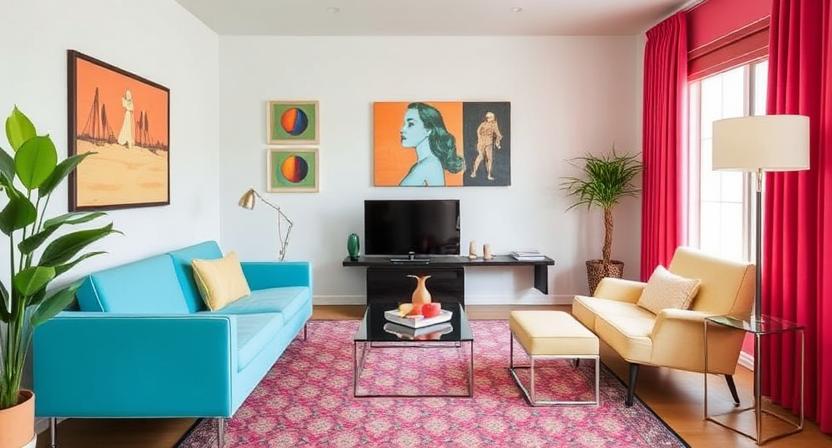
Adding a Pop of Color to Your Retro Lighting
When it comes to infusing your retro lighting with a pop of color, there are numerous ways to go about it. One option is to select vibrant lampshades in bold hues like teal, mustard yellow, or fiery red. These colorful shades can instantly liven up any space and add a playful element to your retro lighting design. Another approach is to utilize colored light bulbs or LED strips to create a dynamic and eye-catching display. Consider mixing and matching different colors to achieve a fun and eclectic look that complements the retro aesthetic of your home decor.
Additionally, you can incorporate colorful accents through the use of retro lighting fixtures themselves. Opt for vintage lamps or pendant lights with colorful glass shades or painted finishes. These unique pieces can serve as statement items in your space while enhancing the overall retro vibe. By strategically incorporating pops of color into your retro lighting scheme, you can create a visually appealing and inviting atmosphere that reflects your personal style and creativity.
• Select vibrant lampshades in bold hues like teal, mustard yellow, or fiery red
• Utilize colored light bulbs or LED strips to create a dynamic display
• Mix and match different colors for a fun and eclectic look
• Opt for vintage lamps or pendant lights with colorful glass shades or painted finishes
Incorporating Geometric Shapes into Your Retro Lighting Design
Incorporating geometric shapes into your retro lighting design can add a touch of modern flair to your space while still paying homage to the classic retro style. By utilizing geometric patterns such as circles, triangles, squares, or hexagons in your lighting fixtures, you can create a visually striking focal point that enhances the overall aesthetic of the room. Whether you opt for a pendant light with a geometric shade or a table lamp with a geometric base, the clean lines and symmetry of geometric shapes can bring a sense of balance and sophistication to your retro decor.
When choosing retro lighting fixtures with geometric shapes, consider how they will interact with the other elements in the room. A pendant light with a geometric pattern can draw the eye upward, highlighting high ceilings or unique architectural features. On the other hand, a table lamp with a geometric base can anchor a space and provide a sense of symmetry on a side table or nightstand. Experiment with different shapes and sizes to find the perfect geometric lighting piece that complements your retro design aesthetic.
• Incorporating geometric shapes into your retro lighting design can bring a touch of modern flair
• Utilize patterns such as circles, triangles, squares, or hexagons for visually striking focal points
• Geometric lighting fixtures can enhance the overall aesthetic of the room
• Choose fixtures that interact well with other elements in the space
• Pendant lights with geometric patterns can highlight high ceilings or architectural features
• Table lamps with geometric bases can provide symmetry on side tables or nightstands
• Experiment with different shapes and sizes to find the perfect piece for your retro design
Tips for Finding Affordable Retro Lighting Supplies
When it comes to finding affordable retro lighting supplies, scouring thrift stores, flea markets, and online marketplaces can be a treasure trove of hidden gems. Keep an eye out for discarded lamps, chandeliers, or lampshades that can be refurbished and transformed into unique retro pieces for your home. Additionally, don’t overlook yard sales or estate sales where you might find vintage lighting fixtures at budget-friendly prices.
Another tip for sourcing affordable retro lighting supplies is to explore DIY and craft stores for materials that can be repurposed into retro-inspired designs. Look for items like metal frames, colored glass pieces, or retro-style bulbs that can be assembled to create custom lighting fixtures. By getting creative and thinking outside the box, you can bring a touch of nostalgia to your space without breaking the bank.
• Look for discarded lamps, chandeliers, or lampshades at thrift stores and flea markets
• Check online marketplaces for affordable retro lighting supplies
• Explore yard sales and estate sales for vintage fixtures at budget-friendly prices
• Visit DIY and craft stores to find materials that can be repurposed into retro-inspired designs
• Consider using metal frames, colored glass pieces, or retro-style bulbs to create custom lighting fixtures
Creating a Statement Piece with Retro Hanging Lights
Creating a statement piece with retro hanging lights can instantly elevate the ambiance of any room. By choosing a bold and eye-catching design, you can transform a basic lighting fixture into a focal point that adds personality and flair to your space. Opt for vintage-inspired shapes like oversized globe pendants or geometric metal frames to bring a touch of nostalgia while making a modern statement.
When selecting the placement for your retro hanging lights, consider the overall layout of the room and how the lighting will interact with other elements such as furniture and decor. Positioning a retro pendant light over a dining table can create a cozy atmosphere for meals, while hanging a cluster of eclectic vintage fixtures in a corner can add visual interest and spark conversation. Remember to play with different heights and angles to achieve a dynamic and visually appealing lighting design that truly stands out.
• Consider choosing bold and eye-catching retro designs
• Opt for vintage-inspired shapes like oversized globe pendants or geometric metal frames
• Select placement based on room layout and interaction with furniture and decor
• Position a pendant light over a dining table for a cozy atmosphere
• Hang a cluster of eclectic vintage fixtures in a corner for visual interest
• Play with different heights and angles to achieve dynamic lighting design
How to Properly Wire and Install Your DIY Retro Lighting
When it comes to wiring and installing your DIY retro lighting, safety should be your top priority. Before starting any electrical work, always remember to turn off the power to the area where you will be working. This will help prevent any accidents or shocks while you are handling the wiring.
Once you have ensured that the power is off, carefully follow the manufacturer’s instructions that came with your retro lighting kit. Each kit may have specific wiring diagrams or steps that you need to follow to properly wire and install the light fixture. Take your time to do it right the first time to avoid any issues down the line.
• Make sure to turn off the power before starting any electrical work
• Follow the manufacturer’s instructions carefully for wiring and installation
• Take your time to do it right the first time to avoid future issues
Repurposing Old Furniture into Retro Floor Lamps
Repurposing old furniture into retro floor lamps is a creative way to breathe new life into outdated pieces while adding a unique touch to your home decor. By transforming items like vintage side tables, wooden stools, or even antique bedside cabinets, you can create functional and stylish lighting fixtures that serve both practical and aesthetic purposes. With a bit of imagination and some basic woodworking skills, you can easily repurpose old furniture into retro floor lamps that become conversation pieces in any room.
When repurposing old furniture into retro floor lamps, consider the existing design and structure of the piece to determine how best to incorporate lighting elements. For example, you may choose to drill holes for wiring or attach lamp sockets to strategic locations that complement the overall look of the furniture. Additionally, selecting the right lampshade and light bulb can further enhance the retro vibe of your creation. By upcycling old furniture into retro floor lamps, you not only reduce waste but also infuse your living space with character and charm that cannot be replicated with store-bought lighting fixtures.
• Repurposing old furniture into retro floor lamps is a creative way to breathe new life into outdated pieces
• By transforming items like vintage side tables, wooden stools, or even antique bedside cabinets, you can create functional and stylish lighting fixtures
• With a bit of imagination and some basic woodworking skills, you can easily repurpose old furniture into retro floor lamps that become conversation pieces in any room
When repurposing old furniture into retro floor lamps:
• Consider the existing design and structure of the piece to determine how best to incorporate lighting elements
• Drill holes for wiring or attach lamp sockets to strategic locations that complement the overall look of the furniture
• Selecting the right lampshade and light bulb can further enhance the retro vibe of your creation
By upcycling old furniture into retro floor lamps:
• You not only reduce waste but also infuse your living space with character and charm
• The unique touch added cannot be replicated with store-bought lighting fixtures
Designing a Mid-Century Modern Inspired Retro Lamp
Mid-century modern style lamps are characterized by sleek lines, geometric shapes, and a minimalist yet functional design. To create a lamp inspired by this aesthetic, opt for materials like brass, teak, or aluminum for the base, and a cylindrical or conical fabric shade in a neutral color. Consider incorporating elements like tapered legs or asymmetrical angles to capture the essence of mid-century modern design.
When choosing a color palette for your mid-century modern inspired lamp, stick to earth tones such as mustard yellow, olive green, or burnt orange to achieve an authentic retro look. Alternatively, you can add a pop of color with a bold hue like teal or coral for a modern twist on this classic style. Remember that simplicity is key in mid-century modern design, so opt for clean lines and minimal embellishments to stay true to the era’s design principles.
• When designing the lamp, consider incorporating elements like tapered legs or asymmetrical angles to capture the essence of mid-century modern design.
• Choose materials such as brass, teak, or aluminum for the base of the lamp to achieve a sleek and minimalist look.
• Opt for a cylindrical or conical fabric shade in a neutral color to complement the overall aesthetic of mid-century modern style.
• Stick to earth tones such as mustard yellow, olive green, or burnt orange for an authentic retro look when selecting a color palette.
• Add a pop of color with bold hues like teal or coral for a modern twist on this classic style while keeping simplicity in mind.
Customizing Your Retro Lighting with Paint and Stencils
When it comes to customizing your retro lighting fixtures with paint and stencils, the possibilities are endless. Adding a fresh coat of paint in a vibrant retro color can instantly transform a plain lamp into a statement piece that complements your decor style. Don’t be afraid to experiment with bold colors like teal, mustard yellow, or coral to give your lighting a unique and eye-catching look that reflects the retro era.
Stencils are another great way to add personality and flair to your retro lighting projects. Whether you opt for geometric shapes, floral motifs, or abstract designs, stenciling can create a customized and artistic touch to your lamps and fixtures. Consider using stencils to create patterns on lampshades, bases, or even directly on bulbs for a one-of-a-kind retro effect.
• Stencils are a versatile tool for adding unique designs to your retro lighting fixtures
• Experiment with different shapes and patterns to create a personalized look
• Stenciling can be done on lampshades, bases, or even directly on bulbs for a creative touch
• Customizing your retro lighting with stencils allows you to showcase your individual style and creativity
Ideas for Incorporating Retro Lighting into Different Rooms
In the living room, consider adding a vintage-inspired floor lamp next to a cozy reading nook to create a warm and inviting atmosphere. Pairing it with a retro table lamp on a side table can enhance the overall ambiance of the room, perfect for relaxing evenings or entertaining guests. For a touch of drama in the dining room, a retro chandelier can serve as a striking focal point above the table, adding personality and style to the space. Complement the chandelier with retro wall sconces to create a cohesive look that exudes charm and sophistication.
In the bedroom, opt for retro bedside lamps with adjustable arms for directional lighting that is both functional and stylish. Positioning a retro desk lamp on a vanity or dresser can provide task lighting while adding a touch of nostalgia to the room’s decor. Consider incorporating a retro ceiling light fixture with a dimmer switch for a soft ambient glow that is perfect for winding down in the evening. Mixing and matching retro lighting elements in the bedroom can create a harmonious blend of vintage charm and modern functionality.
• Vintage-inspired floor lamp next to a cozy reading nook
• Retro table lamp on a side table
• Retro chandelier as a striking focal point in the dining room
• Retro wall sconces for a cohesive look
• Retro bedside lamps with adjustable arms for directional lighting
• Retro desk lamp on a vanity or dresser for task lighting
• Retro ceiling light fixture with dimmer switch for soft ambient glow
• Mixing and matching retro lighting elements for vintage charm
Safety Precautions to Consider When Working with Electrical Wiring
Always prioritize safety when working with electrical wiring for retro lighting projects. Before starting any electrical work, make sure to turn off the power to the area where you will be working. Use a voltage tester to double-check that the power is indeed off and ensure that you are not working on live wires. It is crucial to wear insulated gloves and protective eyewear to prevent any electrical shocks or injuries during the installation process.
Additionally, be cautious when handling tools near electrical wires and avoid using damaged or frayed cords or wires. Make sure to follow the manufacturer’s instructions carefully when wiring your retro lighting fixtures and avoid overloading circuits. Lastly, always consult a professional electrician if you are unsure about any aspect of the wiring process to guarantee a safe and successful project completion.
• Always turn off the power before starting any electrical work
• Use a voltage tester to confirm the power is off
• Wear insulated gloves and protective eyewear
• Be careful when handling tools near electrical wires
• Avoid using damaged or frayed cords/wires
• Follow manufacturer’s instructions carefully
• Avoid overloading circuits
• Consult a professional electrician if unsure about any aspect of wiring process
Utilizing Energy-Efficient Bulbs in Your Retro Lighting Fixtures
When it comes to retro lighting fixtures, incorporating energy-efficient bulbs can enhance both the aesthetic appeal and functionality of your space. Opting for LED bulbs, for instance, not only reduces energy consumption but also emits a warm, inviting glow that complements retro designs. Additionally, LED bulbs have a longer lifespan compared to traditional incandescent bulbs, saving you money on replacements in the long run.
Another eco-conscious option to consider is compact fluorescent lamps (CFLs), which are energy-efficient alternatives to incandescent bulbs. CFLs use less electricity to produce the same amount of light, making them a practical choice for retro lighting fixtures. With advancements in technology, CFLs now come in various shapes and sizes, allowing you to achieve the desired retro look while reducing your carbon footprint.
• LED bulbs emit a warm, inviting glow that complements retro designs
• LED bulbs have a longer lifespan compared to traditional incandescent bulbs
• CFLs use less electricity to produce the same amount of light
• CFLs now come in various shapes and sizes for retro lighting fixtures
Incorporating Natural Elements into Your Retro Lighting Design
When it comes to infusing natural elements into your retro lighting design, consider incorporating materials such as wood, rattan, or bamboo. These materials not only add a touch of warmth and texture to your lighting fixtures but also bring a sense of nature indoors. Opt for wooden lamp bases or rattan pendant shades to create a harmonious blend of retro style and natural elements in your space.
Another way to incorporate natural elements into your retro lighting design is by adding greenery or botanical accents. Consider placing potted plants near your lighting fixtures or hanging planters above your retro lamps to introduce a refreshing and organic vibe to your room. Not only do plants add a pop of color and life to your space, but they also help purify the air and create a more inviting atmosphere.
• Wooden lamp bases or rattan pendant shades can add warmth and texture to your retro lighting fixtures
• Greenery and botanical accents like potted plants or hanging planters can introduce a refreshing and organic vibe to your room
• Plants not only add color and life but also help purify the air and create a more inviting atmosphere
Creating a Vintage Industrial Look with DIY Retro Lighting
For those looking to infuse their space with a vintage industrial aesthetic, DIY retro lighting fixtures offer a unique opportunity to add character and warmth to any room. Incorporating raw materials such as wrought iron, reclaimed wood, and exposed filament bulbs can instantly elevate your space with a touch of old-world charm. By carefully selecting and repurposing these elements into industrial-inspired lighting pieces, you can create a cohesive look that pays homage to the past while maintaining a modern edge.
One popular trend in creating a vintage industrial look with DIY retro lighting is to embrace the beauty of imperfections. Embracing the worn patina of metals, showcasing visible welds, and highlighting the natural grain of wood all contribute to the authentic industrial feel. By focusing on the craftsmanship of each piece and allowing its unique characteristics to shine through, you can achieve a one-of-a-kind lighting fixture that adds a sense of history and nostalgia to your space.
• Embracing imperfections adds authenticity to the industrial look
• Highlighting visible welds and natural wood grain enhances the vintage feel
• Focusing on craftsmanship creates a unique lighting fixture with character
Upcycling Glass Bottles into Retro Pendant Lights
To create unique retro pendant lights, consider upcycling glass bottles. Start by selecting glass bottles of various shapes and sizes to add visual interest to your lighting fixture. Thoroughly clean and remove any labels from the bottles before proceeding with the upcycling process. Next, carefully cut off the bottom of the bottle using a glass cutter to create an opening for the light to shine through. Sand down any rough edges to ensure a smooth finish that is safe to handle.
Once you have prepared the glass bottles, insert a pendant light kit through the opening at the top of the bottle, securing it in place according to the kit instructions. Consider using a vintage-style filament bulb to complement the retro look of the pendant light. Hang the upcycled glass bottle pendant lights at varying heights to create a dynamic and visually appealing lighting display in your home.
• Select glass bottles of various shapes and sizes
• Thoroughly clean and remove labels from the bottles
• Carefully cut off the bottom of the bottle using a glass cutter
• Sand down any rough edges for a smooth finish
• Insert a pendant light kit through the opening at the top of the bottle
• Secure in place according to kit instructions
• Use vintage-style filament bulbs for retro look
• Hang pendant lights at varying heights for dynamic display
Adding a Touch of Whimsy with Retro Animal Shaped Lamps
Retro animal shaped lamps can inject a playful and whimsical vibe into any space. These unique lighting fixtures add a touch of character and charm to your home decor, making them a fun conversation piece. Whether you opt for a quirky cat lamp, a cute bunny light, or a sleek bird silhouette, these animal shaped lamps can instantly uplift the mood of your room.
By strategically placing these retro animal shaped lamps in different corners of your home, you can create a cohesive and imaginative theme. Consider adding a bunny lamp on a bedside table for a touch of whimsy in the bedroom or placing a dog shaped lamp on a shelf in the living room for a dose of nostalgia. These retro animal shaped lamps not only illuminate your space but also serve as decorative accents that reflect your personality and style.
• Retro animal shaped lamps can inject a playful and whimsical vibe into any space
• These unique lighting fixtures add a touch of character and charm to your home decor
• Whether you opt for a quirky cat lamp, a cute bunny light, or a sleek bird silhouette, these animal shaped lamps can instantly uplift the mood of your room
By strategically placing these retro animal shaped lamps in different corners of your home, you can create a cohesive and imaginative theme. Consider adding a bunny lamp on a bedside table for a touch of whimsy in the bedroom or placing a dog shaped lamp on a shelf in the living room for a dose of nostalgia. These retro animal shaped lamps not only illuminate your space but also serve as decorative accents that reflect your personality and style.
How to Maintain and Clean Your DIY Retro Lighting Fixtures
To keep your DIY retro lighting fixtures looking their best, regular maintenance and cleaning are essential. Dust and dirt can accumulate on the surfaces of your fixtures, dulling their shine and affecting the quality of light they emit. To begin the cleaning process, start by unplugging the fixtures and allowing them to cool down completely. Use a soft, dry cloth to gently wipe away any dust or debris from the surface of the fixture. Avoid using harsh chemicals or abrasive cleaners, as these can damage the finish of your retro lighting.
For fixtures with glass components, such as pendant lights or lampshades, a mixture of mild dish soap and warm water can be used to gently clean the glass. Be sure to dry the glass thoroughly with a soft, lint-free cloth to prevent water spots. Additionally, metal components of your retro lighting fixtures can be polished with a metal cleaner to maintain their luster. Taking the time to regularly clean and maintain your DIY retro lighting fixtures will not only keep them looking great but also ensure they continue to provide you with stylish illumination for years to come.
• Regular maintenance and cleaning are essential for DIY retro lighting fixtures
• Dust and dirt can accumulate, dulling the shine and affecting light quality
• Unplug fixtures and allow them to cool before cleaning
• Use a soft, dry cloth to wipe away dust and debris from surfaces
• Avoid harsh chemicals or abrasive cleaners that can damage the finish
For fixtures with glass components:
• Use a mixture of mild dish soap and warm water to clean glass
• Dry thoroughly with a soft, lint-free cloth to prevent water spots
For metal components:
• Polish with a metal cleaner to maintain luster
Regularly cleaning and maintaining DIY retro lighting fixtures:
– Keeps them looking great
– Ensures they provide stylish illumination for years