Researching the Vintage Car
When researching a vintage car for restoration, it is important to gather as much information as possible about the make, model, and year of the vehicle. This can include historical data, production numbers, original specifications, and any known issues or common problems associated with that particular car. By having a comprehensive understanding of the vintage car you are interested in, you can make informed decisions throughout the restoration process. Utilizing resources such as online forums, enthusiast websites, and vintage car clubs can provide valuable insights and help guide your research efforts.
Another crucial aspect of researching a vintage car is assessing the availability and cost of replacement parts. Some older car models may have rare or hard-to-find parts that can significantly impact the feasibility and cost of a restoration project. By researching the availability of parts beforehand, you can avoid potential challenges and delays down the line. Additionally, understanding the current market value of the vintage car in restored condition can help you set a realistic budget and determine if the project aligns with your financial goals.
• Gather historical data, production numbers, original specifications, and common issues of the vintage car
• Utilize online forums, enthusiast websites, and vintage car clubs for valuable insights
• Assess availability and cost of replacement parts before starting restoration project
• Understand current market value of the vintage car in restored condition to set a realistic budget
Selecting the Right Vintage Car
Selecting the right vintage car is a crucial step in embarking on a restoration project. When choosing a vintage car to restore, it’s important to consider factors such as personal preference, availability of parts, and the overall condition of the vehicle. Additionally, researching common issues and challenges associated with specific makes and models can help in making an informed decision.
Understanding the scope of the restoration project and setting realistic expectations are key in selecting the right vintage car. Whether it’s a classic American muscle car or a European sports coupe, ensuring that the chosen vehicle aligns with your restoration goals and budget will ultimately lead to a more successful and fulfilling experience.
• Personal preference plays a significant role in selecting the right vintage car for restoration
• Availability of parts is crucial to consider as sourcing rare or discontinued parts can be challenging
• Researching common issues and challenges associated with specific makes and models can help in making an informed decision
• Understanding the scope of the restoration project and setting realistic expectations are key factors
• Ensuring that the chosen vehicle aligns with your restoration goals and budget is essential for a successful experience
Setting a Budget for the Project
Determining a budget for a vintage car restoration project is a crucial step in the planning process. It’s essential to realistically assess how much you are willing and able to invest in the restoration to avoid unexpected financial strain along the way. Consider factors such as the initial cost of the vintage car, the extent of restoration needed, the price of replacement parts, tools, and other expenses to come up with a comprehensive budget.
Researching the average costs associated with similar restoration projects can provide you with a ballpark figure to start with. Additionally, accounting for unexpected expenses by setting aside a contingency fund is wise, as unforeseen challenges often arise during the restoration process. Having a clear budget in place from the outset will help you stay on track and make informed decisions throughout the restoration journey.
• Research average costs associated with similar restoration projects
• Consider initial cost of vintage car, extent of restoration needed, price of replacement parts, tools, and other expenses
• Set aside a contingency fund for unexpected expenses
• Having a clear budget will help you stay on track and make informed decisions throughout the project
Creating a Restoration Plan
When embarking on a vintage car restoration project, it is essential to create a detailed restoration plan to guide the process. Begin by conducting a thorough inspection of the car to assess its current condition and identify the areas that require attention. Take note of any mechanical issues, body damage, rust, or corrosion that need to be addressed during the restoration.
Once you have a clear understanding of the work that needs to be done, prioritize the tasks in the restoration plan based on their complexity and importance. Break down the restoration process into smaller, more manageable steps, such as disassembling the car, sourcing replacement parts, and addressing any structural repairs. By outlining a comprehensive restoration plan, you can stay organized and focused throughout the project, ensuring that you make steady progress towards bringing the vintage car back to its former glory.
• Conduct a thorough inspection of the car to assess its condition
• Identify areas that require attention such as mechanical issues, body damage, rust, or corrosion
• Prioritize tasks based on complexity and importance in the restoration plan
• Break down the restoration process into smaller, manageable steps
• Include tasks such as disassembling the car, sourcing replacement parts, and addressing structural repairs
Inspecting the Vintage Car
When beginning a vintage car restoration project, a crucial step is inspecting the vehicle thoroughly to assess its condition. Start by examining the exterior body for any signs of rust, dents, or paint damage. Take note of any areas that may require bodywork or repainting to restore the car’s aesthetic appeal. Moving on, check the condition of the tires and wheels for wear and tear, flat spots, or uneven tread wear, which could indicate alignment issues or suspension problems.
Next, open the hood and inspect the engine compartment for any visible damage, leaks, or missing components. Check the oil level and condition, as well as the coolant and brake fluid levels, to gauge the car’s maintenance history and potential mechanical issues. Additionally, inspect the interior of the vehicle for any wear and tear on the upholstery, dashboard, and instrument panel. Look for any signs of water damage, mold, or electrical issues that may need attention during the restoration process.
• Examine the exterior body for rust, dents, or paint damage
• Check tires and wheels for wear, flat spots, or uneven tread wear
• Inspect engine compartment for visible damage, leaks, or missing components
• Check oil level and condition, coolant and brake fluid levels
• Assess interior for wear on upholstery, dashboard, and instrument panel
Making a Parts List
After inspecting the vintage car and assessing the necessary repairs and replacements, the next step in the restoration process is to make a detailed parts list. This involves identifying all the components that need to be replaced, refurbished, or upgraded to bring the car back to its former glory. A thorough examination of each part of the vehicle is crucial in ensuring that no essential components are overlooked during this phase.
To create an effective parts list, it is essential to categorize the required parts based on priority and necessity. Start by listing essential components like engine parts, brakes, suspension, and drivetrain elements that are vital for the car’s functionality. Then, move on to cosmetic parts such as trim pieces, interior components, and exterior accessories that enhance the vintage car’s appearance. By organizing the parts list in a systematic manner, it becomes easier to track down each component and ensure that no critical elements are missed during the restoration process.
• Engine parts
• Brakes
• Suspension
• Drivetrain elements
• Trim pieces
• Interior components
• Exterior accessories
Finding Reliable Suppliers for Parts
Once you have identified the parts needed for your vintage car restoration project, the next step is to find reliable suppliers to purchase them from. Start by researching online suppliers that specialize in vintage car parts. Look for suppliers with positive reviews and a good reputation within the vintage car community. Additionally, consider reaching out to local auto shops or vintage car clubs for recommendations on reputable parts suppliers in your area.
When contacting potential suppliers, be sure to inquire about the quality of the parts they offer, their return policy, and their shipping options. It’s also important to ask about the availability of the parts you need and any lead times for delivery. By gathering this information from multiple suppliers, you can compare prices and services to ensure you are getting the best deal on high-quality parts for your vintage car restoration project.
Once you have identified the parts needed for your vintage car restoration project, the next step is to find reliable suppliers to purchase them from. Start by researching online suppliers that specialize in vintage car parts. Look for suppliers with positive reviews and a good reputation within the vintage car community. Additionally, consider reaching out to local auto shops or vintage car clubs for recommendations on reputable parts suppliers in your area.
• Research online suppliers specializing in vintage car parts
• Look for suppliers with positive reviews and good reputation
• Reach out to local auto shops or vintage car clubs for recommendations
When contacting potential suppliers, be sure to inquire about the quality of the parts they offer, their return policy, and their shipping options. It’s also important to ask about the availability of the parts you need and any lead times for delivery. By gathering this information from multiple suppliers, you can compare prices and services to ensure you are getting the best deal on high-quality parts for your vintage car restoration project.
• Inquire about part quality, return policy, and shipping options
• Ask about part availability and lead times
• Compare prices and services from multiple suppliers
Acquiring the Necessary Tools
When embarking on a vintage car restoration project, it is essential to have the right tools at your disposal. A well-equipped toolbox can make the difference between a smooth restoration process and a frustrating one. Basic hand tools such as wrenches, screwdrivers, pliers, and sockets are must-haves for tackling various tasks during the restoration process. Additionally, specialized tools like a torque wrench, breaker bar, and impact driver can be invaluable for handling specific components of the vintage car.
Investing in quality tools is a wise decision as they will not only make the restoration process more efficient but also ensure precision and accuracy in your work. Consider purchasing tools from reputable brands known for their durability and reliability. Having a well-organized toolbox with all the necessary tools within reach will streamline the restoration process and help you tackle any challenges that may arise along the way.
• Wrenches, screwdrivers, pliers, and sockets are essential hand tools for restoration projects
• Specialized tools like torque wrenches, breaker bars, and impact drivers can be invaluable
• Investing in quality tools from reputable brands ensures efficiency and precision in work
• A well-organized toolbox with all necessary tools within reach streamlines the restoration process
Learning Basic Automotive Skills
Learning basic automotive skills is pivotal when embarking on a vintage car restoration project. Understanding fundamental concepts such as engine mechanics, electrical systems, and bodywork will be essential in successfully restoring a classic vehicle. Familiarizing oneself with tools and equipment commonly used in automotive work is also crucial before diving into the restoration process.
Beginners in the world of automotive restoration should consider enrolling in basic car maintenance courses or workshops to gain hands-on experience and knowledge. Learning how to perform tasks like changing oil, replacing filters, and troubleshooting electrical issues will lay a solid foundation for more advanced restoration work. Additionally, studying repair manuals and online resources can provide valuable insights into the intricacies of vintage car mechanics.
• Enrolling in basic car maintenance courses or workshops
• Gaining hands-on experience and knowledge
• Learning how to change oil, replace filters, and troubleshoot electrical issues
• Studying repair manuals and online resources for valuable insights into vintage car mechanics.
Preparing the Workspace
Before diving into the restoration process of your vintage car, it is crucial to establish a well-organized and functional workspace. Start by clearing out any clutter and creating ample space to maneuver around the vehicle. Ensure that the workspace is well-lit to aid in visibility and accessibility during the restoration tasks. Additionally, consider investing in sturdy workbenches and storage solutions to keep tools and parts organized and easily accessible.
Next, take the time to gather all the necessary tools and equipment required for the restoration project. Make sure to have a variety of tools on hand, such as wrenches, sockets, screwdrivers, and power tools, to tackle different aspects of the restoration process. Organize your tools in a tool chest or pegboard for easy identification and access. Lastly, establish a designated area for cleaning parts and components, as well as for any painting or refinishing work that may be required during the restoration process. A clean and well-equipped workspace will greatly streamline the restoration process and ensure a successful outcome.
• Clear out any clutter and create ample space
• Ensure workspace is well-lit for visibility
• Invest in sturdy workbenches and storage solutions
• Gather all necessary tools and equipment for the project
• Organize tools in a tool chest or pegboard for easy access
• Establish designated area for cleaning parts and painting/refinishing work
Disassembling the Vintage Car
When disassembling a vintage car for restoration, it is crucial to approach the task methodically and carefully. Begin by labeling and organizing all removed parts to ensure smooth reassembly later on. Take detailed notes or photographs during the disassembly process to serve as a reference point.
Prioritize removing larger components first, such as the engine, transmission, and suspension system. Use the appropriate tools and techniques to safely disconnect and extract these parts. Tackling disassembly in a systematic manner will make the restoration project more manageable and help prevent damage to delicate components.
• Label and organize all removed parts
• Take detailed notes or photographs for reference
• Remove larger components first (engine, transmission, suspension system)
• Use appropriate tools and techniques for safe disconnection
• Approach disassembly in a systematic manner to prevent damage
Documenting the Process
Documenting the process of restoring a vintage car is crucial for keeping track of the various steps taken and ensuring a smooth progression throughout the project. Taking detailed notes, photographs, and videos at each stage can serve as a valuable reference point and help in troubleshooting any issues that may arise later on. By documenting everything from disassembly to reassembly, you create a comprehensive record that can be beneficial for future maintenance or potential resale.
In addition to serving as a roadmap for the restoration project, documenting the process can also be a rewarding aspect of the experience. It allows you to look back on the journey of transforming a vintage car and appreciate the hard work and dedication put into bringing it back to life. Sharing your documentation with others in the vintage car community can also be a source of inspiration and knowledge exchange, fostering a sense of camaraderie among fellow enthusiasts.
• Documenting the process helps in keeping track of various steps taken
• Detailed notes, photographs, and videos serve as valuable reference points
• Helps in troubleshooting any issues that may arise later on
• Creates a comprehensive record for future maintenance or resale
In addition to serving as a roadmap for the restoration project:
• Documenting the process can be a rewarding aspect of the experience
• Allows you to look back on the journey of transforming a vintage car
• Appreciate the hard work and dedication put into bringing it back to life
• Sharing documentation with others fosters camaraderie among fellow enthusiasts
Organizing Parts and Components
Once all the parts and components have been disassembled from the vintage car, it is crucial to organize them systematically. This will not only help in keeping track of the parts but also make the reassembly process much smoother. One effective way to organize the parts is by labeling them and storing them in clearly labeled containers or bags. Another helpful tip is to create a detailed inventory list to ensure that no part goes missing during the restoration process.
Additionally, grouping similar parts together can streamline the restoration process further. By organizing parts such as nuts, bolts, and small components separately from larger parts like the engine or chassis, it becomes easier to locate specific items when needed. Taking the time to organize and label all parts and components may seem tedious at first, but it can save a considerable amount of time and frustration in the long run.
• Label all parts and store them in clearly labeled containers or bags
• Create a detailed inventory list to keep track of all parts
• Group similar parts together for easier access during reassembly
• Organize nuts, bolts, and small components separately from larger parts like the engine or chassis
Cleaning and Restoring Parts
With the vintage car disassembled, the next step is to focus on cleaning and restoring the various parts. This process involves removing dirt, grime, and rust to bring back the original shine and functionality of the components. Using a combination of solvents, brushes, and specialized cleaning products, each part should be carefully inspected and treated accordingly.
After cleaning, parts may require further restoration to address wear and tear. This can involve processes such as sanding, polishing, or even re-plating to bring back the original finish. It is crucial to pay attention to detail during this stage to ensure that each part not only looks good but also functions properly when reassembled into the vintage car.
• Once the parts are cleaned, inspect them carefully for any signs of wear and tear
• Use specialized products and tools to restore the original shine and functionality of each component
• Consider sanding, polishing, or re-plating as needed to bring back the original finish
• Pay close attention to detail to ensure that each part looks good and functions properly when reassembled
Addressing Rust and Corrosion
After inspecting the vintage car, addressing rust and corrosion is a crucial step in the restoration process. Rust can not only be unsightly but also compromise the structural integrity of the vehicle. To tackle this issue, start by identifying all areas affected by rust, including hidden spots like under the car’s body or inside the engine bay.
Once you have pinpointed the areas with rust and corrosion, the next step is to remove it effectively. This can be done through various methods such as sanding, grinding, or chemical treatments. After the rust has been removed, it’s important to apply a rust inhibitor to prevent future corrosion. Remember that proper treatment of rust not only improves the aesthetics of the vintage car but also ensures its longevity.
• Start by identifying all areas affected by rust, including hidden spots
• Remove rust effectively through methods such as sanding, grinding, or chemical treatments
• Apply a rust inhibitor to prevent future corrosion
• Proper treatment of rust improves aesthetics and ensures longevity of the vintage car
Repairing Body Damage
Repairing body damage on a vintage car is a critical step in the restoration process. Whether dealing with dents, scratches, or more severe structural issues, it is important to address the body damage carefully and methodically. Start by assessing the extent of the damage and creating a plan of action to restore the body to its original condition.
When repairing body damage, it is essential to use the right tools and techniques to ensure a professional finish. This may involve welding, sanding, filling, and painting, depending on the severity of the damage. Take your time with each step, focusing on quality craftsmanship to achieve the best results. By following a systematic approach and paying attention to detail, you can effectively repair body damage and bring your vintage car one step closer to completion.
• Assess the extent of the damage
• Create a plan of action for restoration
• Use the right tools and techniques for professional finish
• Welding, sanding, filling, and painting may be necessary
• Focus on quality craftsmanship in each step
• Follow a systematic approach
• Pay attention to detail for best results
Painting the Vintage Car
After addressing any rust and corrosion on the vintage car, the next step in the restoration process is painting. This stage not only enhances the overall aesthetics of the vehicle but also provides crucial protection against external elements. Before beginning the painting process, it is essential to thoroughly clean and prepare the surface of the car to ensure a smooth and durable finish. Sanding, priming, and proper masking off of areas not to be painted are necessary steps to achieve a professional result.
When selecting the paint for your vintage car, consider factors such as the desired color, finish, and durability. Acrylic enamel, acrylic lacquer, and urethane are popular choices for vintage car restoration projects due to their high-quality finishes and long-lasting effects. It is recommended to apply multiple thin coats of paint rather than one thick coat to avoid runs and drips. Additionally, allowing sufficient drying time between each coat is crucial to achieving a flawless finish.
• Thoroughly clean and prepare the surface of the car before painting
• Sanding, priming, and masking off areas not to be painted are necessary steps
• Consider factors such as color, finish, and durability when selecting paint
• Acrylic enamel, acrylic lacquer, and urethane are popular choices for vintage car restoration projects
• Apply multiple thin coats of paint to avoid runs and drips
• Allow sufficient drying time between each coat for a flawless finish
Reassembling the Vintage Car
Reassembling the vintage car is often seen as the culmination of countless hours of hard work and dedication. Each part and component must be carefully put back together, ensuring that everything fits and functions properly. It’s crucial to refer to any documentation or photos taken during the disassembly process to guarantee that every piece is returned to its rightful place.
Moreover, attention to detail is key during the reassembly stage to avoid any hiccups or setbacks later on. Double-checking each step and making sure that all connections and fastenings are secure will help guarantee a successful restoration project. Patience and precision are virtues as the vintage car starts to take shape once again, promising the eventual satisfaction of seeing the fully reassembled vehicle ready for its next chapter on the road.
• Carefully refer to documentation or photos taken during disassembly
• Ensure every part is returned to its rightful place
• Pay attention to detail and double-check each step
• Make sure all connections and fastenings are secure
• Practice patience and precision throughout the reassembly process
Testing the Restored Car
Once the restoration process is complete and the vintage car has been meticulously reassembled, it is time to test its functionality. This crucial step involves carefully checking each system of the vehicle to ensure it is in proper working order. From the engine to the brakes, lights, and interior components, every aspect must be thoroughly tested to guarantee optimal performance.
Testing the restored car involves taking it for a test drive to assess its overall performance on the road. Pay close attention to how the vehicle accelerates, brakes, handles turns, and operates at different speeds. Any unusual noises, vibrations, or handling issues should be addressed promptly to ensure the safety and functionality of the vintage car.
• Check the engine to ensure it starts smoothly and runs without any unusual noises or vibrations
• Test the brakes to make sure they are responsive and do not pull to one side
• Inspect the lights, including headlights, taillights, turn signals, and brake lights, to confirm they are working properly
• Evaluate the interior components such as the dashboard gauges, radio, heating/cooling system, and power windows for functionality
• Take note of how the vintage car handles different road conditions and speeds during the test drive
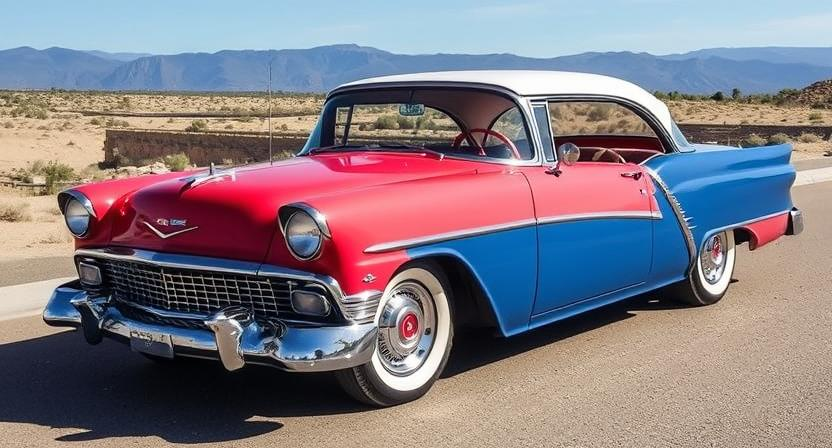
Enjoying the Finished Product
After putting in countless hours of hard work, dedication, and meticulous attention to detail, the moment has finally arrived to bask in the glory of the finished product. Standing back and admiring the vintage car that was once a mere shell of its former self now fully restored to its former glory is a truly gratifying experience. The satisfaction that comes from breathing new life into a piece of automotive history is unparalleled.
Every curve, every shining chrome detail, and every polished surface tells a story of dedication, commitment, and passion for vintage automobiles. The finished product stands as a testament to the craftsmanship, knowledge, and skills that were poured into its restoration. From the gleaming paint job to the purring engine, each element of the vintage car reflects the culmination of a laborious yet rewarding journey.
• The shine of the polished chrome details catches the eye and showcases the attention to detail
• The smooth curves of the bodywork highlight the craftsmanship that went into restoring the car
• Hearing the engine purr brings a sense of accomplishment and satisfaction for all the hard work put in
• Taking a step back and admiring the finished product allows for a moment of pride and fulfillment