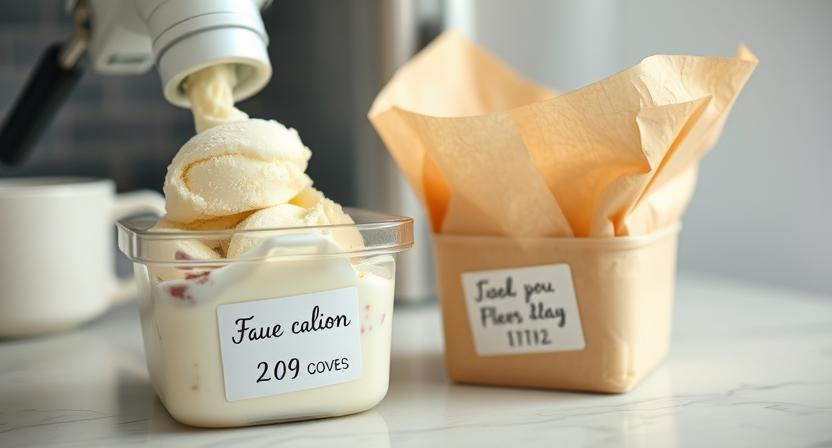
Ingredients for Homemade Ice Cream
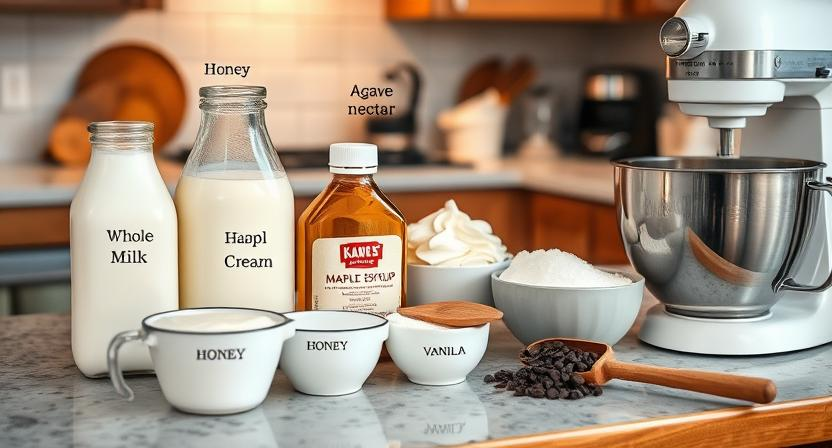
Homemade ice cream is a delightful treat that allows for endless creativity in flavor and texture. To make a basic ice cream base, you will need milk and cream as the primary ingredients. Whole milk and heavy cream are commonly used for their richness and creaminess, but you can customize the ratio based on your preference for a lighter or richer ice cream.
In addition to milk and cream, sweeteners are essential to balance the flavors and ensure a smooth texture in your homemade ice cream. Common sweeteners include sugar, honey, maple syrup, or agave nectar. Experimenting with different sweeteners can add depth and complexity to your ice cream, so feel free to explore various options to find the perfect balance for your taste buds.
• Whole milk and heavy cream are commonly used for richness
• Customize ratio based on preference for lighter or richer ice cream
• Sweeteners like sugar, honey, maple syrup, or agave nectar are essential
• Experimenting with different sweeteners can add depth to ice cream flavor
Choosing the Right Milk and Cream
When it comes to creating homemade ice cream, selecting the right milk and cream is essential in achieving the desired texture and taste. Whole milk and heavy cream are often recommended for their richness and creaminess, providing a solid base for the flavors to shine through. Opting for higher fat content dairy products like heavy cream results in a more luxurious and indulgent ice cream that is sure to satisfy even the most discerning of palates.
For those looking to reduce the fat content in their ice cream, using low-fat milk or half-and-half can be a suitable alternative. While these options may result in a lighter final product, they may also compromise some of the creaminess and richness typically associated with traditional ice cream. Experimenting with different ratios of milk to cream can help strike a balance between a lighter dessert and a decadent treat.
• Whole milk and heavy cream are recommended for richness and creaminess
• Higher fat content dairy products like heavy cream result in a more luxurious ice cream
• Low-fat milk or half-and-half can be used to reduce fat content
• Using low-fat options may compromise some of the creaminess and richness
• Experimenting with ratios of milk to cream can help strike a balance
Selecting the Best Sweeteners
When it comes to selecting the best sweeteners for homemade ice cream, it’s essential to consider the flavor profile you want to achieve. Granulated sugar is a common choice for its ability to enhance the creaminess of the ice cream and help in achieving a smooth texture. However, other options such as honey, maple syrup, agave nectar, and even brown sugar can bring unique flavors and textures to your frozen dessert. Experimenting with different sweeteners can add depth and complexity to your homemade ice cream, allowing you to tailor the sweetness to your liking.
For those looking to explore healthier alternatives, natural sweeteners like stevia, erythritol, and monk fruit can be excellent choices. These sweeteners provide sweetness with fewer calories and a lower glycemic index, making them suitable for those watching their sugar intake. Keep in mind that each sweetener behaves differently during the freezing process, so be prepared to adjust your recipe accordingly to achieve the desired texture and sweetness level in your homemade ice cream.
• Granulated sugar is a common choice for enhancing creaminess and smooth texture
• Options like honey, maple syrup, agave nectar, and brown sugar can bring unique flavors
• Experimenting with different sweeteners adds depth and complexity to homemade ice cream
• Natural sweeteners like stevia, erythritol, and monk fruit are healthier alternatives
• These sweeteners provide sweetness with fewer calories and lower glycemic index
Incorporating Flavorings and Mix-Ins
When it comes to creating homemade ice cream, incorporating flavorings and mix-ins is where you can get really creative and make your dessert truly unique. Whether you prefer classic flavors like vanilla or chocolate, or you want to experiment with more adventurous combinations like lavender honey or blueberry basil, the possibilities are endless. Adding fresh fruits, nuts, candies, or even spices can take your homemade ice cream to the next level.
Mix-ins like chocolate chips, cookie dough chunks, or swirls of caramel can add delightful texture and flavor bursts to your ice cream. When adding mix-ins, it’s important to consider the size and texture of the ingredients to ensure they distribute evenly throughout the ice cream. For example, chopping nuts into small pieces or prepping candies into bite-sized chunks can help prevent them from sinking to the bottom of the ice cream base. Experimenting with different mix-ins and flavor combinations can turn your homemade ice cream into a gourmet treat that will impress your family and friends.
• Adding fresh fruits, nuts, candies, or spices can enhance the flavor of homemade ice cream
• Mix-ins like chocolate chips, cookie dough chunks, or caramel swirls can add texture and bursts of flavor
• Consider the size and texture of mix-ins to ensure even distribution throughout the ice cream base
• Experimenting with different mix-ins and flavor combinations can elevate homemade ice cream to a gourmet level
The Role of Eggs in Ice Cream Making
Eggs play a crucial role in the process of making homemade ice cream. They act as an emulsifier, helping to blend the fat and water components together smoothly. This results in a rich and creamy texture that is characteristic of traditional custard-based ice creams, providing a velvety mouthfeel that lingers on the palate.
Additionally, eggs contribute to the overall stability and structure of the ice cream as it freezes. The proteins in the yolks help to bind the ingredients together, preventing the formation of large ice crystals and ensuring a smooth consistency. This is particularly important in the churning process, as it helps create a light and airy texture that is desirable in a high-quality ice cream.
• Eggs act as an emulsifier, blending fat and water components smoothly
• Provides rich and creamy texture characteristic of custard-based ice creams
• Contributes to overall stability and structure of the ice cream as it freezes
• Proteins in yolks help bind ingredients together, preventing large ice crystals
• Helps create a light and airy texture during churning process
Preparing the Ice Cream Base
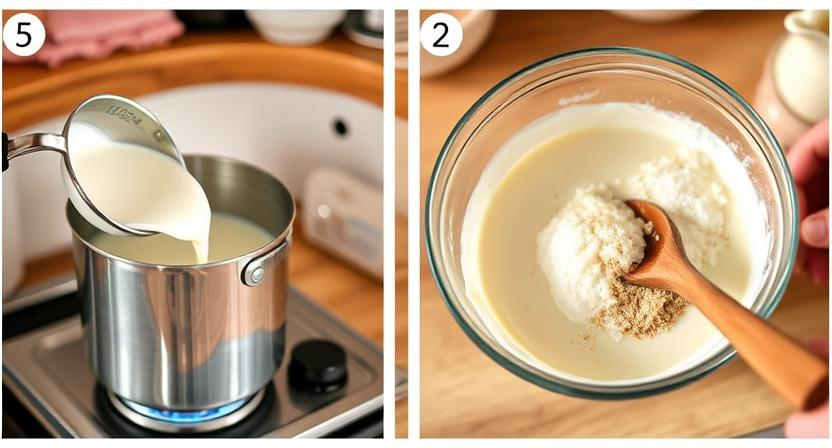
Once you have gathered all your ingredients—the milk, cream, sweeteners, and any flavorings or mix-ins—it is time to begin preparing the ice cream base. Begin by heating the milk and cream in a saucepan over low heat, making sure not to boil the mixture. This step helps infuse the dairy with any added flavors and ensures a smooth texture in the final product.
While the milk and cream are heating, whisk together the sweeteners in a separate bowl until they are fully dissolved. Once the dairy mixture is warm, slowly pour a small amount into the sweetened mixture, stirring constantly to temper the eggs if you are using them in your recipe. Gradually incorporate the rest of the dairy into the sweetened mixture, stirring continuously until everything is well combined. This creamy and sweet base will serve as the foundation for the delicious homemade ice cream you are about to create.
• Heat the milk and cream in a saucepan over low heat
• Whisk together sweeteners until fully dissolved
• Slowly pour small amount of dairy into sweetened mixture, stirring constantly
• Gradually incorporate rest of dairy into sweetened mixture, stirring continuously
Churning the Ice Cream
Once the ice cream base is ready, it’s time to churn it into a creamy and luxurious texture. Churning incorporates air into the mixture, resulting in a lighter and smoother ice cream. This process helps prevent ice crystals from forming and gives the ice cream its desired consistency.
Whether you are using a hand-cranked ice cream maker or an electric one, the key is to follow the manufacturer’s instructions for churning. Typically, the ice cream should be churned until it reaches a soft-serve consistency. Over-churning can lead to a grainy texture, while under-churning may result in a dense and icy ice cream. Pay close attention to the churning time to achieve the perfect balance of creaminess and airiness in your homemade treat.
• Churning incorporates air into the ice cream mixture
• Helps prevent ice crystals from forming
• Gives the ice cream a lighter and smoother texture
Whether using a hand-cranked or electric ice cream maker:
• Follow manufacturer’s instructions for churning
• Ice cream should be churned until soft-serve consistency is reached
• Over-churning can lead to grainy texture, under-churning may result in dense and icy ice cream
• Pay close attention to churning time for perfect balance of creaminess and airiness
Using a Hand-Cranked Ice Cream Maker
Hand-cranked ice cream makers offer a nostalgic and interactive way to churn homemade ice cream. These traditional machines, often powered by hand turning or cranking, require a bit of physical effort but result in a rich and creamy treat that is worth the manual labor. The process of hand-cranking the ice cream maker not only adds a fun element to the ice cream-making experience but also allows for better control over the churning speed and consistency of the final product.
When using a hand-cranked ice cream maker, it’s crucial to follow the manufacturer’s instructions carefully to ensure optimal results. Most hand-cranked models involve layering the ice cream mixture between layers of ice and salt in the maker’s canister. The continuous cranking motion helps freeze the mixture evenly and prevents any ice crystals from forming, resulting in a smooth and creamy texture. Overall, the hands-on approach of using a hand-cranked ice cream maker adds a delightful touch to the process of creating delicious frozen desserts at home.
• Hand-cranked ice cream makers offer a nostalgic and interactive way to churn homemade ice cream.
• These traditional machines require manual effort but result in rich and creamy ice cream.
• The process of hand-cranking allows for better control over churning speed and consistency.
• Follow manufacturer’s instructions carefully when using a hand-cranked ice cream maker.
• Layer the ice cream mixture between layers of ice and salt in the canister for optimal results.
• Continuous cranking motion helps freeze the mixture evenly, preventing ice crystals from forming.
Optimizing Your Electric Ice Cream Maker
To optimize the performance of your electric ice cream maker, it is crucial to ensure that the freezer bowl is frozen thoroughly before starting the churning process. This typically requires a freezing time of at least 24 hours, though some models may recommend longer periods for best results. A properly frozen bowl will help the ice cream mixture freeze quickly and evenly during the churning stage, resulting in a smoother and creamier final product.
Additionally, when pouring the ice cream base into the frozen freezer bowl, make sure not to overfill it beyond the manufacturer’s recommended capacity. Overfilling can lead to uneven freezing and may cause the mixture to overflow as it expands during churning. It is advisable to follow the instructions provided with your specific electric ice cream maker to achieve the best outcomes. By paying attention to these details and following the guidelines set forth by the manufacturer, you can optimize your electric ice cream maker to produce delicious homemade treats with every batch.
• Ensure the freezer bowl is frozen thoroughly before churning
• Follow recommended freezing time of at least 24 hours
• Avoid overfilling the freezer bowl beyond manufacturer’s capacity
• Pay attention to instructions provided with your specific ice cream maker
By following these simple steps, you can optimize the performance of your electric ice cream maker and enjoy perfect homemade ice cream every time.
Freezing Ice Cream without a Machine
One popular method for freezing ice cream without a machine involves pouring your prepared ice cream base into a shallow, freezer-safe container. Cover the container with a lid or plastic wrap before placing it in the freezer. Every 30 minutes for the next 2-3 hours, remove the container from the freezer and vigorously stir the mixture to break up any ice crystals that may be forming.
Alternatively, you can use a simple zip-top plastic bag to create a makeshift ice cream maker. Pour the ice cream base into the bag, squeeze out excess air, and seal it tightly. Nestle the filled bag in a larger bag filled with ice and rock salt, then vigorously shake the bags for about 5-10 minutes or until the mixture has thickened to your desired consistency.
• One popular method for freezing ice cream without a machine involves pouring your prepared ice cream base into a shallow, freezer-safe container.
• Cover the container with a lid or plastic wrap before placing it in the freezer.
• Every 30 minutes for the next 2-3 hours, remove the container from the freezer and vigorously stir the mixture to break up any ice crystals that may be forming.
• Alternatively, you can use a simple zip-top plastic bag to create a makeshift ice cream maker.
• Pour the ice cream base into the bag, squeeze out excess air, and seal it tightly.
• Nestle the filled bag in a larger bag filled with ice and rock salt.
• Vigorously shake the bags for about 5-10 minutes or until the mixture has thickened to your desired consistency.
Storing Homemade Ice Cream
After you have churned and frozen your homemade ice cream to perfection, it is essential to store it properly to maintain its flavor and texture. Transfer the ice cream from the churner into a clean, airtight container, ensuring that it is filled to the top to minimize air exposure and ice crystal formation. Press a piece of parchment paper or plastic wrap directly onto the surface of the ice cream before sealing the container with a lid. Store the ice cream in the coldest part of your freezer, preferably at the back, to shield it from temperature fluctuations when the freezer door is opened.
Remember to label the container with the date and flavor of the ice cream to keep track of its freshness. Homemade ice cream typically lasts for up to two weeks in the freezer before the texture begins to degrade. To prevent ice cream from developing freezer burn, try to consume it within this timeframe. If the ice cream becomes too hard in the freezer, allow it to soften in the refrigerator for a few minutes before scooping and serving. Never refreeze melted ice cream as it can become grainy and lose its creamy consistency.
• Transfer ice cream to a clean, airtight container filled to the top
• Press parchment paper or plastic wrap onto surface before sealing with lid
• Store in coldest part of freezer, preferably at the back
• Label container with date and flavor for freshness tracking
• Homemade ice cream lasts up to two weeks before texture degrades
Remember that proper storage is key to enjoying your homemade ice cream for as long as possible. By following these simple steps, you can ensure that your frozen treat maintains its delicious taste and creamy texture. So next time you whip up a batch of homemade ice cream, be sure to store it correctly for maximum enjoyment!
Troubleshooting Common Ice Cream Issues
One common issue when making homemade ice cream is ending up with a gritty texture. This can happen if the sugar you use is not fully dissolved in the milk and cream mixture. To prevent this, make sure to heat the mixture gently until the sugar completely dissolves before churning. Additionally, using superfine sugar or heating the mixture slightly longer can help achieve a smoother texture in your ice cream.
Another problem that ice cream makers often encounter is ice crystals forming in the final product. This can occur if the churned ice cream is not frozen quickly enough or if it’s stored in the freezer for too long. To avoid this issue, try transferring the freshly churned ice cream into a container with a tight-fitting lid and placing it in the coldest part of your freezer. Be mindful not to leave the ice cream in the freezer for extended periods to maintain its creamy texture.
• Make sure sugar is fully dissolved in the milk and cream mixture
• Heat the mixture gently before churning
• Consider using superfine sugar or extending heating time for smoother texture
• Transfer freshly churned ice cream into a container with a tight-fitting lid
• Store ice cream in coldest part of freezer
• Avoid leaving ice cream in freezer for extended periods to prevent ice crystals
Experimenting with Different Textures
When it comes to homemade ice cream, experimenting with different textures can take your frozen treats to the next level. From smooth and creamy to light and airy, there are various techniques you can try to achieve the desired consistency. One way to play with texture is by adjusting the fat content in your base recipe. Higher fat content will result in a richer, creamier texture, while lower fat content can lead to a lighter, fluffier ice cream.
Another method to experiment with textures is by incorporating mix-ins at different stages of the churning process. Adding ingredients like nuts, chocolate chunks, or fruit purees towards the end of churning can create pockets of contrasting textures throughout the ice cream. Additionally, varying the speed and duration of churning can impact the final consistency of your ice cream. Be mindful of over-churning, as it can lead to a dense and icy end product. Experimenting with swirls and ribbons of sauces or syrups can also add a delightful textural contrast to your homemade ice cream.
• Adjusting the fat content in the base recipe can result in different textures
• Adding mix-ins at different stages of churning creates pockets of contrasting textures
• Varying the speed and duration of churning impacts final consistency
• Be mindful of over-churning to avoid a dense and icy end product
• Experimenting with swirls and ribbons of sauces or syrups adds textural contrast.
Creating Dairy-Free Ice Cream Options
For those who are looking to enjoy the creamy goodness of ice cream without dairy, there are plenty of options available. Coconut milk is a popular choice for creating dairy-free ice cream, as it offers a rich and creamy base that mimics traditional dairy products. Almond milk is another great alternative, providing a light and nutty flavor that pairs well with various mix-ins and flavorings.
Experimenting with different plant-based milk alternatives such as soy milk, cashew milk, or oat milk can also result in delicious dairy-free ice cream creations. These non-dairy options offer unique flavors and textures that can be customized to suit individual preferences. By utilizing dairy-free milk alternatives and incorporating quality ingredients, it is possible to enjoy a satisfying and flavorful frozen treat that is suitable for those with dietary restrictions or preferences.
• Coconut milk is a popular choice for creating dairy-free ice cream
• Almond milk provides a light and nutty flavor
• Experimenting with plant-based milk alternatives such as soy, cashew, or oat milk can result in delicious creations
• Non-dairy options offer unique flavors and textures that can be customized to suit individual preferences.
Making Vegan Ice Cream
To make vegan ice cream, it’s essential to start with a non-dairy base. Popular options include coconut milk, almond milk, or cashew milk. These plant-based alternatives provide a creamy texture that mimics traditional dairy ice cream without using any animal products. By choosing a high-quality non-dairy milk, you can ensure a rich and satisfying vegan ice cream experience.
Once you have selected your non-dairy base, it’s time to sweeten and flavor your vegan ice cream. Maple syrup, agave nectar, or coconut sugar are excellent choices for sweetening, while vanilla extract, cacao powder, or fruit purees can add delicious flavors to your homemade vegan desserts. Experimenting with different combinations of sweeteners and flavorings can help you create unique and delightful vegan ice cream options to enjoy.
• Start with a non-dairy base such as coconut milk, almond milk, or cashew milk
• Choose high-quality non-dairy milk for a creamy texture
• Sweeten with maple syrup, agave nectar, or coconut sugar
• Add flavor with vanilla extract, cacao powder, or fruit purees
• Experiment with different combinations of sweeteners and flavorings
Infusing Alcohol into Ice Cream
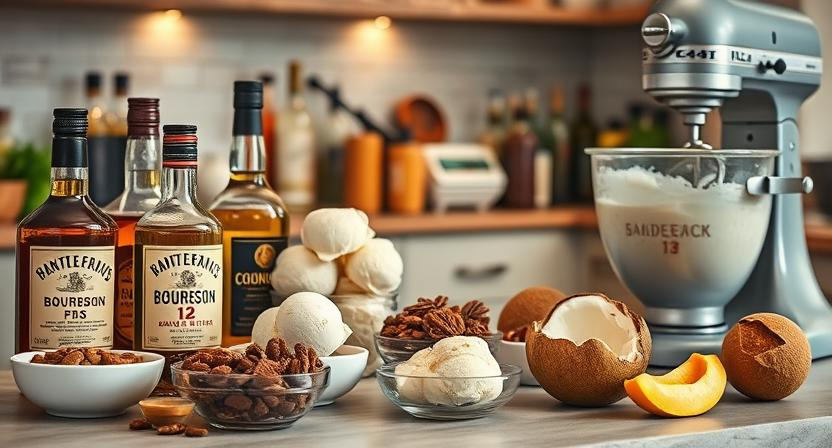
When infusing alcohol into ice cream, it’s important to consider the alcohol content and freezing point. Adding too much alcohol can prevent the ice cream from freezing properly, resulting in a slushy consistency. To avoid this issue, limit the amount of alcohol added to the ice cream base and opt for spirits with higher alcohol content for better flavor preservation during freezing.
Choose complementary flavors when incorporating alcohol into your ice cream. For instance, bourbon pairs well with flavors like caramel or pecan, while rum complements tropical fruits like coconut or pineapple. Experiment with different combinations to find the right balance of alcohol and flavors to create a delicious and boozy treat.
• When infusing alcohol into ice cream, consider the alcohol content and freezing point
• Limit the amount of alcohol added to avoid a slushy consistency
• Opt for spirits with higher alcohol content for better flavor preservation during freezing
• Choose complementary flavors when incorporating alcohol into your ice cream
• Experiment with different combinations to find the right balance of alcohol and flavors
Exploring Unusual Flavor Combinations
When it comes to homemade ice cream, the flavor possibilities are endless. Mixing unexpected ingredients and flavors can result in unique and exciting combinations that will delight your taste buds. Don’t be afraid to think outside the box and experiment with unconventional pairings such as lavender and honey, bacon and maple syrup, or even jalapeno and chocolate.
By incorporating herbs, spices, exotic fruits, or even savory elements into your ice cream base, you can create a one-of-a-kind dessert that will leave your guests intrigued and impressed. Consider infusing your ice cream with cardamom for a warm and aromatic flavor, or adding chunks of tangy goat cheese and figs for a sweet and savory contrast. Let your imagination run wild and don’t be afraid to push the boundaries of traditional ice cream flavors.
• Lavender and honey
• Bacon and maple syrup
• Jalapeno and chocolate
By incorporating herbs, spices, exotic fruits, or even savory elements into your ice cream base, you can create a one-of-a-kind dessert that will leave your guests intrigued and impressed. Consider infusing your ice cream with cardamom for a warm and aromatic flavor, or adding chunks of tangy goat cheese and figs for a sweet and savory contrast. Let your imagination run wild and don’t be afraid to push the boundaries of traditional ice cream flavors.
Decorating and Serving Homemade Ice Cream
When it comes to presenting your homemade ice cream, the way you serve and decorate it can elevate the entire experience. Start by choosing the perfect bowl or cone to showcase your frozen creation. Opt for clear glass bowls to display the vibrant colors and layers of your ice cream, or go for a classic waffle cone for a nostalgic touch. Remember that presentation is key to making your dessert visually appealing and enticing.
To take your homemade ice cream presentation to the next level, consider adding a variety of toppings and garnishes. Sprinkles, crushed nuts, fresh fruits, chocolate shavings, and whipped cream are just a few options to enhance both the flavor and aesthetics of your dessert. Experiment with different combinations of toppings to create unique and eye-catching ice cream sundaes that will impress your guests. Don’t forget to add a final drizzle of caramel, hot fudge, or fruit sauce for a finishing touch that will make your homemade ice cream truly unforgettable.
• Experiment with different combinations of toppings to create unique ice cream sundaes
• Sprinkles, crushed nuts, fresh fruits, chocolate shavings, and whipped cream are popular options
• Add a final drizzle of caramel, hot fudge, or fruit sauce for a finishing touch
• Choose clear glass bowls or classic waffle cones to showcase your homemade ice cream
• Presentation is key to making your dessert visually appealing and enticing
Hosting an Ice Cream Social
For a fun and delicious gathering, consider hosting an ice cream social with family and friends. This simple and enjoyable event allows guests to customize their own sweet treats and socialize in a casual setting. Set up a variety of ice cream flavors, toppings, and sauces on a buffet table for everyone to create their unique sundae masterpiece. Be sure to provide plenty of bowls, spoons, and napkins for easy serving and cleanup.
To add a touch of nostalgia to your ice cream social, consider setting up a make-your-own soda fountain station with different flavored sodas and syrups for guests to craft their soda floats. You can also include a selection of waffle cones and bowls for those who prefer their ice cream in a crunchy shell. Don’t forget to have some extra toppings like chopped nuts, sprinkles, and whipped cream for guests to enhance their dessert experience. With a little planning and creativity, hosting an ice cream social can be a sweet and memorable event for everyone to enjoy.
• Set up a buffet table with various ice cream flavors
• Provide a variety of toppings and sauces for guests to choose from
• Offer bowls, spoons, and napkins for easy serving
• Consider adding a make-your-own soda fountain station
• Include waffle cones and bowls for crunchy options
• Have extra toppings like nuts, sprinkles, and whipped cream available
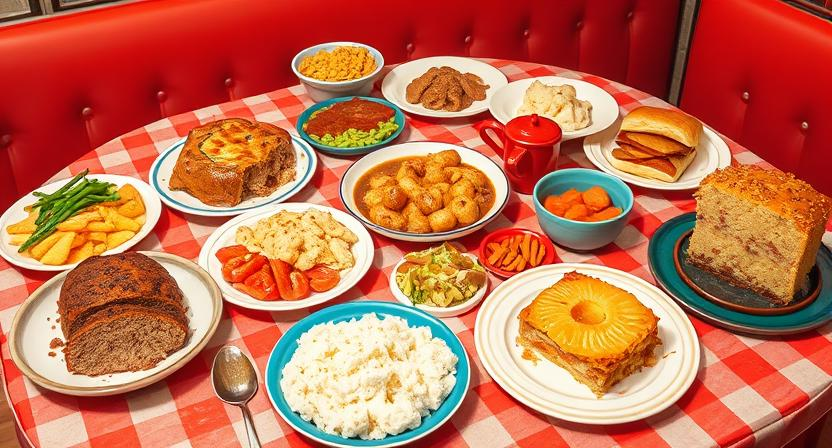
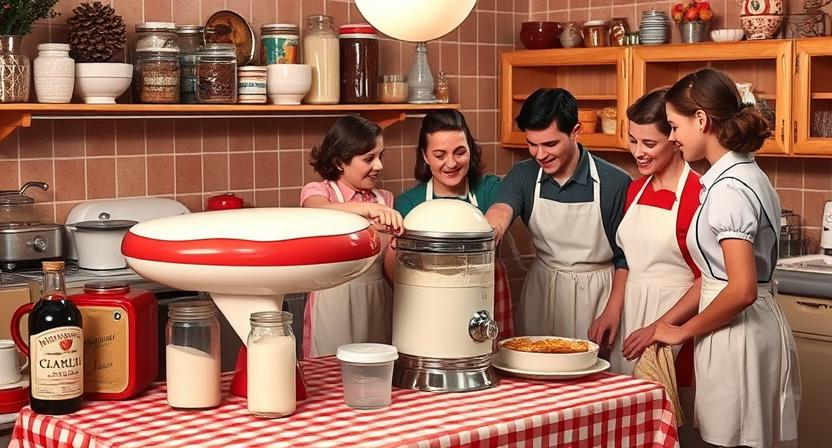
Reviving Old-Fashioned Ice Cream Recipes
Rediscovering old-fashioned ice cream recipes can be a delightful way to connect with the past and savor the timeless flavors of traditional desserts. These classic recipes often feature simple ingredients that come together to create rich and creamy ice creams that are full of nostalgia. By reviving these old-fashioned recipes, you can experience the charm of homemade ice cream in its purest form and share these delectable treats with friends and family.
Exploring vintage ice cream recipes allows you to appreciate the craftsmanship and ingenuity of past generations when it comes to creating frozen delights. From old-fashioned churned ice creams to unique flavor combinations that have stood the test of time, these recipes offer a glimpse into the creativity and resourcefulness of home cooks from years gone by. By taking a step back in time through old-fashioned ice cream recipes, you can add a touch of history to your dessert repertoire and create memorable culinary experiences.
• Rediscovering old-fashioned ice cream recipes can be a delightful way to connect with the past and savor the timeless flavors of traditional desserts.
• These classic recipes often feature simple ingredients that come together to create rich and creamy ice creams that are full of nostalgia.
• By reviving these old-fashioned recipes, you can experience the charm of homemade ice cream in its purest form and share these delectable treats with friends and family.
• Exploring vintage ice cream recipes allows you to appreciate the craftsmanship and ingenuity of past generations when it comes to creating frozen delights.
• From old-fashioned churned ice creams to unique flavor combinations that have stood the test of time, these recipes offer a glimpse into the creativity and resourcefulness of home cooks from years gone by.
• By taking a step back in time through old-fashioned ice cream recipes, you can add a touch of history to your dessert repertoire and create memorable culinary experiences.